
Nearly all of the food scraps including stale bread, grains, coffee grounds, tea bags, meal leftovers, fruit and vegetable waste, and general refrigerator spoilage goes into the trash box. What most people don’t know is that recycling, segregating and composting can reduce waste from 1000 kgs to only 100 kgs. The best part is, none of these methods require a lot of effort. Composting is one of the best ways to deal with waste. All the food waste is composed of organic matter that can be used to make fertilizer. This fertilizer is not only completely organic but is also much higher in nutrients as compared to other chemical-based fertilizers. Without further ado, let’s talk about how to convert kitchen waste into compost.
How to convert kitchen waste into compost
The whole process consists of six simple steps. They are as follow
- Step One: Collect the kitchen waste
- Step Two: Dig a hole in your garden
- Step Three: Cover the waste with soil
- Step Four: Wait For two to four weeks
- Step Five: Check the area after two weeks
- Step Six: Check the area after one month
Now let’s check out the whole process in detail…
1. Step One: Collect the kitchen waste
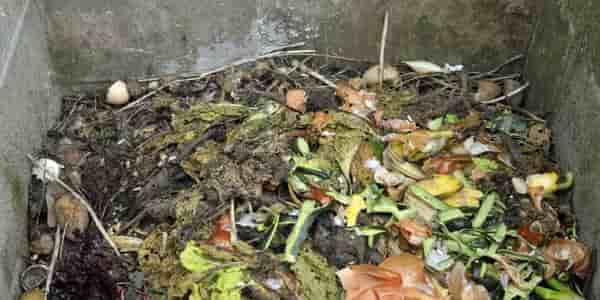
The first step towards making your own compost is collecting your kitchen waste. Fruit peelings, vegetable scraps eggshells, over-ripened fruits, vegetables and nuts that you throw out and tissue papers are the main food remnants that you should keep aside. Even though you can use dairy products, fatty meats, and greasy products in your compost, they will only make it sticky and will produce an annoying odor. Keep a separate bin for these scraps and keep adding more till you have enough. It is better to put the bin in a dry, sunny and level area where the extra moisture can drain out. It is important that you add paper towels or brown materials like wood ash or sawdust to expedite the process. If you have livestock, you can also add manure. These complementary products provide carbon to aid the process and also prevent the food scraps from producing unpleasant odors.
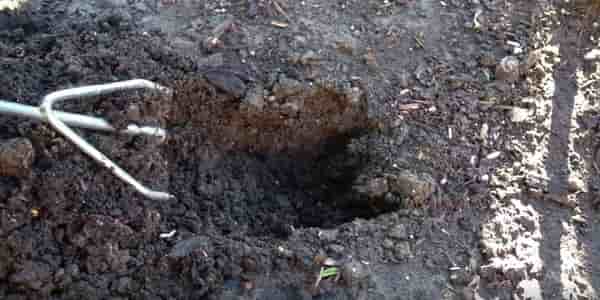
2. Step Two: Dig a hole in your garden
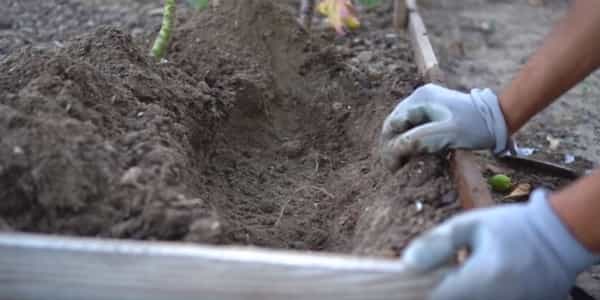
The next step is to dig a hole in your garden. Make sure you dig the hole according to the number of food scraps you have. While digging the hole, make sure you don’t go very deep into the ground. Six to eight inches deep is more than enough. If you have more scraps, you can make the hole wider.
If you don’t have a garden, you can always construct a composting bin. It can be anything from a bucket to a dustbin to a basic garden pot. Drill some holes in the container to let air in. layer the bottom of the container with some newspaper and then add a layer of soil. Place all the food scraps over it.
3. Step Three: Cover the waste with soil
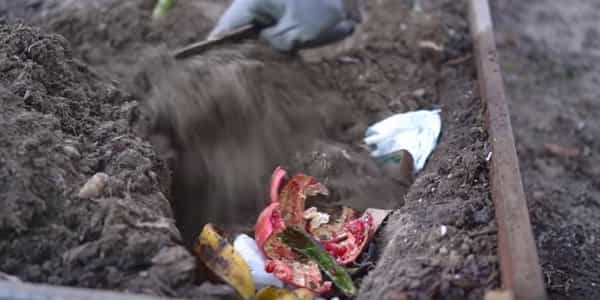
Covering your food scraps with soil is one of the most important steps. Make sure you completely cover all the scraps with soil, whether it is on the ground or in the composting bin. This not only helps in reducing the odor produced but will also keep the critters at bay.
4. Step Four: Wait For two to four weeks

The next step is to wait. Composting takes at least two to four weeks. While waiting, make sure you keep your composting bin or the ground moist. During the waiting period, it is important that you don’t plant something in the area. This is because the decomposition process will deprive the plant roots of all the oxygen. For those who don’t know, when organic matter decomposes, it requires massive amounts of oxygen. Planting vegetables, fruits or any other plants in an area where a decomposition process is going on is not a good idea. You will end up with dead plants.
5. Step Five: Check the area after two weeks
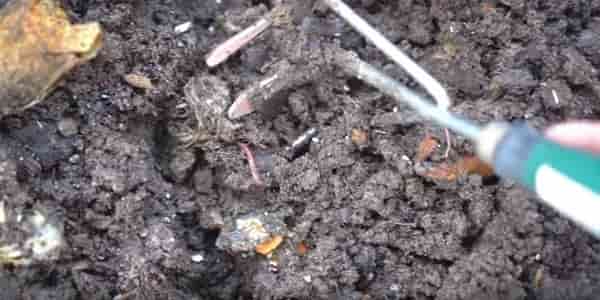
Once the scraps are buried, go about your life for two weeks. After two weeks, you need to check your compost. You might encounter more than a few worms while digging the area, so be prepared. If along with worms, you see black dirt, you are in the right direction. This is worm casting and is actually what makes compost so full of nutrients, enzymes, and beneficial microbes.
While digging you might see some of the scraps intact. If you don’t, your compost is ready. If you do, cover it up and let the worms do their job.
6. Step Six: Check the area after one month
After one month, you are supposed to find the area loaded with worm casting that is basically what you need. There is a 99 percent chance that all the scraps would have decomposed by now. You might see many worms here and there which is a good sign.
If you have created the compost in your garden, no need to dig up the soil, just plant over it and you will find your babies blooming in a few days. However, if you have created the compost in a compost bin, take the soil out and add it to the plant pot you want. You can also divide it into different pots.
Some key things you need to remember while converting kitchen waste into compost
The method mentioned above is not without risk. Burying kitchen scraps directly into the ground can lead to diseases due to the spread of bacteria and fungi. This can be rectified by ensuring that you have enough worms in your garden. If you don’t, you can always buy them from a nursery or from online sources. They are not very difficult to find.
The next thing to keep in mind is that before planting anything make sure all the scraps have been completely decomposed. If you don’t, unfinished composed will ruin your plants if not kill them.
Last but not least is keeping the area moist. I cannot stress this enough. Without proper moisture, earthworms will not be able to transform the scraps into worm casting properly.
Conclusion
Composting your kitchen waste offers several benefits which include being getting rid of extra waste and getting free fertilizer on top of being eco-friendly. On average, a family of 4 people creates 1000 kgs of waste every month. These massive amounts of waste have been resulting in overly littered areas in every country. It is our social responsibility to produce and dispose of waste responsibly. So hope our article about how to convert kitchen waste into compost will help you to get a basic idea about this topic. This type of fertilizer is very good for plants and especially for vegetable plants. We also have an article that is about how to fertilize vegetable plant. So besides this article is you wish can check this article too. So that’s all from this article.