
Wondering how to use a Subsoiler properly and when to use it? You’re just in the right place because that’s what we will be sharing in this article. Not to mention, subsoiling is the latest trend in farming to tackle soil compaction in particular. The plowing implement can modify soil structure and develop its composition. Yes, compact layers has severe problem for cultivation. It can lead to poor drainage to lowering the number of crops in the harvesting month. However, remember that pulling a Subsoiler recklessly into the soil won’t solve it you need to do this in a proper way.You should be careful about the timing and learn the correct depth to use it. Otherwise, you’ll be asking for more troubles in the long run. One of which could be degradation of the topsoil.
Considering its importance below we are about to address all the basic aspects relating to Subsoilers and subsoiling. So, without further ado, here we go!
How to Use a Subsoiler
Subsoiling Definition
Let’s start with the definition of Subsoiler.
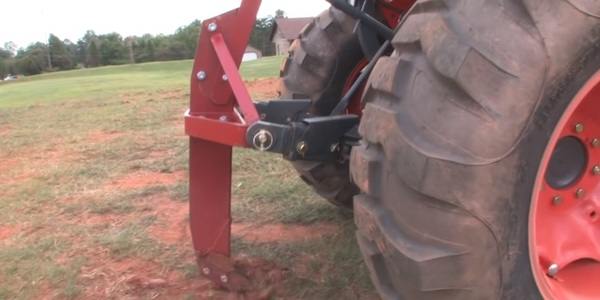
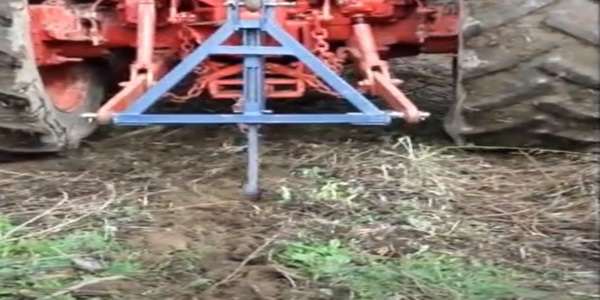
A Subsoiler is a tillage attachment that many crop owners use nowadays especially when soil compaction occurs. It needs a utility tractor to mount or host this type of attachment. You are then capable of driving this tool on your farmland and let the angled shanks to loosen up the soil. Some of the Subsoiler blades (shank) can reach up to 30 inches into the soil. Due to breaking up soil to such depth subsoiling is ideal to tear hardpans and reduce the chances of drowning in wet conditions. Hardpan, by the way, is an outcome of soil compaction.
How To Use The Subsoiler: 5 Steps To Follow
Step 1: Pick the Right Time to Subsoil
To benefit from subsoiling working out the best timing is the main thing. Early autumn is generally the best time to subsoil since soil stays relatively drier this time around. By the way, never attempt subsoiling when it’s too wet. Wet soil contains more clay and less likely to shatter. This will then restrict vertical cracks, an important feature of subsoiling that allows roots to bore into the soil.
If you grow rapeseed as part of the rotation make sure to subsoil before winter. Rapeseed is very responsive to soil compaction and thus subsoiling ahead of seeding will enhance their establishment. It is not wise, however, to subsoil and leave the land barren afterward. Instead, plant some roots to seize the composition and allow it to sustain. Subsoiling is also a choice to grow cover crops when there is doubt that the roots will not progress through the soil at the adequate depth.
Step 2: Subsoil According to Tramline
If you are using fixed tramline patterns on the farm, make sure to loosen up soil at both sides of your tramlines and position the subsoiler’s tine accordingly.
On the flip side, if you use unusual tramlines every year, breaking up soil at the centre will be recommended.
Step 3: Knowing the Right Depth
When breaking up hardpan it’s important to learn that beneath this layer the soil is often maintained healthy conditions. Therefore, working too deep could actually make things worse.
Earlier I’ve mentioned how to determine the compaction point. However many cultivation experts suggest soil loosening depth between 8 and 15 inches. You may also want to adjust it (and avoid creating weakness at a certain layer) and go shallower each year. You can do it easily simply by modifying the length of your Subsoiler leg.
Step 4: Lift Soil with Moderate Angle
Apart from varying the plowing depth keeping the right angle on the vertical shaft is important. Because steeper angles often increase the risk of boiling soil. Therefore keep a moderate angle to lift or crack the soil and use low disturbance tines with and without the wings.
However, if you have to work deeper try to go for a longer wing rather than a steeper one. In short, the goal is to break up hardpans and not creating holes and furrows in the end.
Step 5: Maneuvering the Subsoiler
Once your subsoiler is ready to take on, run it a few yards at full speed first and verify whether it is achieving the proper vertical cranks. Depending on the severity of the compaction, and the number of legs, you may have to run the Subsoiler a few paces over the hardpan. When loosening the soil, you don’t need to smear up, instead push them upwards to grow an effective channel at the base.
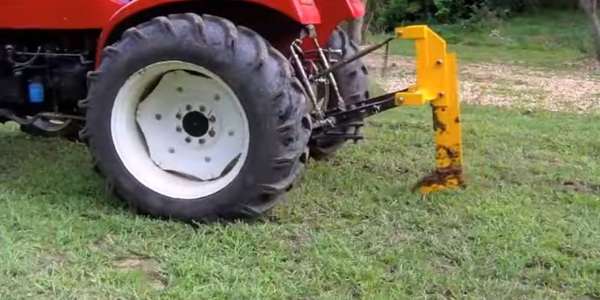
Subsoiler parts: What Does A Subsoiler Consist Of
There is nothing fancy when looking at the conventional Subsoiler.Usually, it has two sections:
Tool frame
It is essentially where the shanks are mounted (with share bolts)and get mobilized. Based on your specific model they can be V-shaped or straight. V-shaped tool framesare generally fitted with a single row of tines where as a straight frame is available with both single and double rows.
Shank/Tine
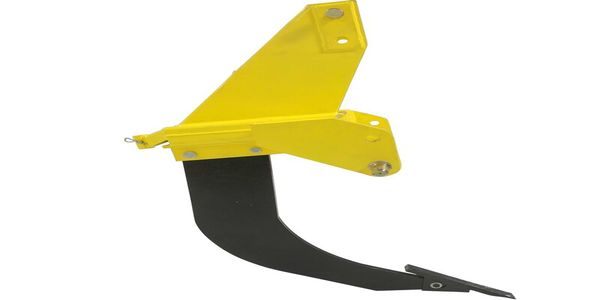
They are vertical blades work to penetrate the soil.Each of them consists of a leg/shank and a point. The shank generally holds a sweep angle between 30-45 degrees and can reach up to 1 or 2 inches below the compacted layerof the soil. The point featuresa sharp tip to allow the leg plow through the repellent soil and loosen it up. Usually wider the leg the greater the disturbance.
What Are The Types Of Subsoiler
Based on the shank design there are two major categories you’re most likely to see.
- Conventional Subsoiler
- Winged Tip Subsoiler
Conventional Subsoiler
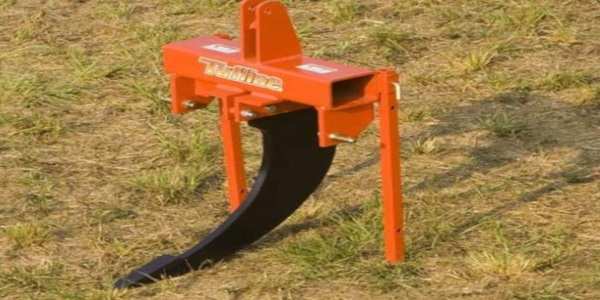
Did I mention about conventional Subsoiler above? They are quite common and used with a single blade towed behind a utility tractor to dig small to medium-sized gardens. You’ll also find some models compatible with a three-point hitch. The width of the shank can range from 2-4 cm.
Usually, the thicker the shanks the better they handle rocky conditions, whereas thinner shanks are more appropriate for agricultural use. Apart from this, you can adjust the height of your shank and choose to replace the point as they are available in various shapes (i.e., parabolic, straight, swept, etc.).
Winged Tip Subsoiler
Now there are horizontal wings available that you can attach to the points and increase the volume of soil loosed by the Subsoiler. This additional attachment brings more efficiency than conventional tips and improves the drain channel below the plowing depth. A typical wing can be 30 cm wide and hold up to a 60-degree sweep angle.
When Is Subsoiling Necessary
Identifying the signs of soil compaction is a precondition before any deep tillage. Because disrupting the natural soil structure when it is in good shape is pointless. A classic example would be a loss of yield in the harvesting period or traffic damage in moist areas.Simply dig down trenches at different depths and expose them contourvertically. Carefully look for a drastic change in moisture levels and the absence of roots.Also, check whether roots are growing sideways as this will be damaging for nearby crops.
N.B. Changes in moisture between topsoil (first 5-10 inches) and subsoil are normal.
Now use a pocket knife and insert its blade at different places throughout the profile.By doing this, you can determine the position of compaction layers, especially at the point you encounter a high penetration resistance. However, avoiding this sort of assignment in wet terrain is advisable. To address the problem areas repeat the procedure in every 50-acre plot. Once you’re done with a good amount of sample, subsoiling in those specific spots will be a good remedy.
What Are The Benefits Of Subsoiling
Subsoiling is a revolution in the field of agriculture with definitive advantages.
More Nutrients to Crops root
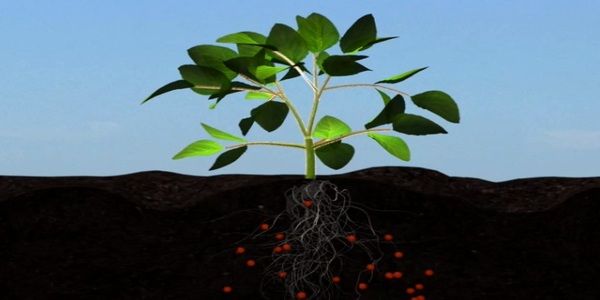
High maintenance soils like silty clay loam are prone to natural compression making it harder for necessary water to get all the way down to the plant roots. In such a situation, deep tillage like subsoiling is useful.
It will break up hard-packed soil allowing standing water better access,and improvingroot aeration at the same time. Vegetation will flourish as a result, since more nutrients and minerals can readily penetrate the deep soil.
Keeping Moisture In Check
If you have a pasture positioned alongside a dense treeline subsoiling will cut those unwanted roots beneath the surface preventing their access into your planting areas. Practically this lets you control the size of the hedge, reduce the robbing of moisture,and hence helping your pasture to grow.
Restrict Soil Compaction & Related Loss
Soil compaction can harm 10-15 % yield potential (ref:Ohio State Research) of the land, a heavy loss especially when converted into monetary terms. With reference to 150 bu /acre harvests at $2 /bu, it can reduce the return up to $30k to $40k for a 1,000 acres corn crop. The loss could be significantly lowered if subsoiling is done properly at the right time.
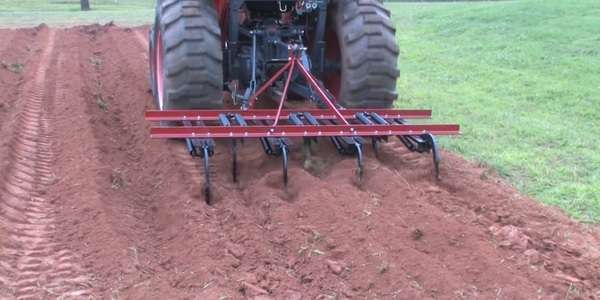
Subsoiler Vs. Plow: What Are The Differences
This is a common question often asked by many novice farmers or farm owners. So, let’s look at some basic differences between these two tillage implement below.
Purpose
A plow is frequently used as primary ploughing equipment where a Subsoiler is intended for deep tillage when soil compaction takes place.
Design
Subsoilers often feature one or two standards, but plows feature a series of standards. This means plows have to keep closer space between each standard, whereas subsoilers often have wider spacing.
Operating Depth
Subsoiler’s blade (shank) can penetrate up to 20 to 45 inches into the soil, twice than what you can expect from a plow that works shallower. Therefore, in areas of heavy compaction (hardpan), subsoilers are more effective.
Required Power
The input required to pull a general plow is around 20-25 HP per standard. Subsoilers are heavier and hence need a more powerful tractor (60-100 HP for each shank). This will lead to added costs in fuel consumption as well.
Final Words
Coming to the end, we believe this article has helped you understand how to use a subsoiler, its components, and subsoiling as a whole. Let us also remind you that following the manufacturer’s manual and safety precautions is mandatory before you operate a piece of machine. This will help you avoid potential damages. Lastly, we hope you will use your Subsoiler in the right manner and able to get good results in the growing season and if you want to purchase one for your firm or back yard you can also check our best subsoiler list .