
On contrary to common belief, planting Iris bulbs is pretty easy. These plants are very popular with florists due to their vibrant colors, long life and easy planting methods. Usually known as the Dutch Iris, this purple flower plant has long, strong and straight stems, almost like green onions. Their bulbs also look like small onions. They are mostly planted for use in decorations and bouquets since they can easily fit into any arrangement. Moreover, their plantation process and maintenance are not difficult either. So, it is popular amongst the amateur gardener community. The plants are usually sowed in August and September. They start blooming a month or so after planting. In this article, we have listed down everything you need to know about how to plant iris bulbs
How to Plant Iris Bulbs
Planting Irish bulbs consist of five straightforward steps
Those steps are given below…
Step One: Soil Mix Ratio
Whenever you are planting something, the first and foremost point to consider is the soil mix ratio. In most cases, plants like Dutch Iris cannot survive if the soil is not nutritious enough or is not well drained. At this point, it is imperative to understand that drainage hold key important for plants at large. If a soil is not well drained, there is a 100 percent chance that roots of your plant will be attacked by fungus or fungus gnats. There are other pests that can infect your plants as well. Hence, if you are new to gardening, make sure you use a large pot with a lot of drainage holes at the bottom.
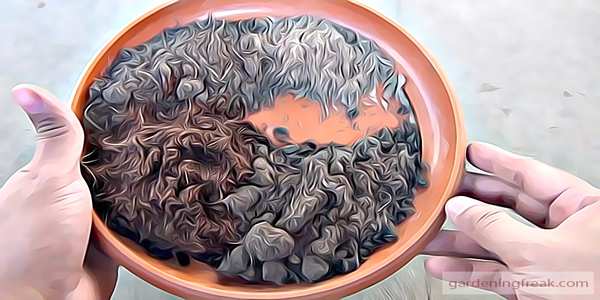
In most cases, to plant an Iris bulb the soil composition consists of equal parts of garden soil, vermicompost and cocopeat. You can also use compost powder in case vermicompost is not available. Peat moss can also be added. However, if you are not using cocopeat, make sure you add a little sand to the mixture, it improves the drainage. Cocopeat provides proper drainage along with nutrition. Also, before mixing the garden soil, check for its texture. If it is more clay like, increase the amount of sand in the mixture. Before planting the bulbs, make sure the soil is thoroughly mixed.
Step Two: Selecting the Bulbs
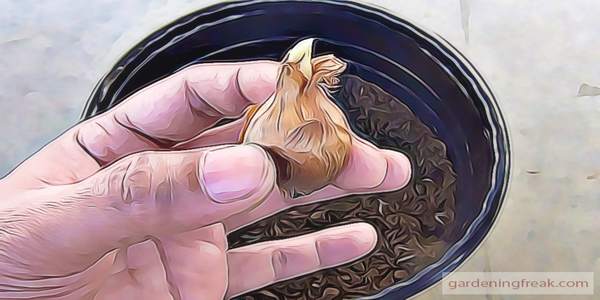
Your plant is as good as the seed you sow. There is no question about this. Hence, while choosing the bulbs for your Dutch Iris, it is important to examine them to ensure the bulbs are healthy and will sprout easily. An average healthy Dutch Iris bulb is one inches tall and about 0.5-inch wide. However, in most cases, the bulb looks healthy apparently. To ensure the bulb is not rotten on the inside slightly press it. If it is not rotten, it will feel solid. If it has been infected with fungus, it will feel mushy. Planting a mushy bulb with other bulbs will affect the growth of healthy bulbs as well. Moreover, a bad bulb will also look slightly dried and raisin-like.
Step Three: How Deep to Plant Iris Bulbs
Mostly bulbs and seeds require certain conditions to sprout and germinate. One of the most important things to consider here is the planting depth. An average rule of thumb is to plant the seed or bulb two times deeper than its length. Hence, if the bulb is one-inch long, you should plant it 2 inches into the soil.
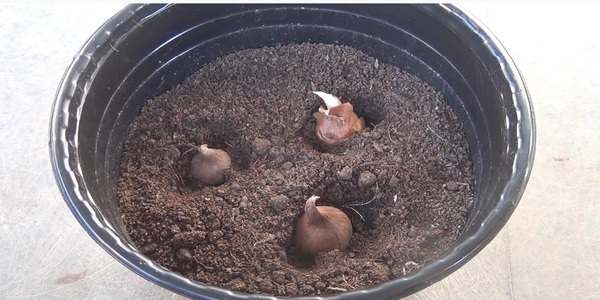
However, if you have already germinated the bulb or seed using the paper towel method or any other method, don’t plant it deep inside the soil. Plant it such that the sprouting part is slightly above the soil. If you don’t do that, the sprout will rot and the plant will not grow. Other than this, while planting the Dutch Iris don’t press the bulb inside the soil to make space for it. Dig small holes using your finger or any other equipment. Pressing the bulbs to make space in the soil might damage them or the sprouts.
Also, at this point make sure the soil mixture is not clay like as it will prevent the roots from spreading around easily. Use different components to create your soil so that it is unpacked and the roots have enough space to spread out easily.
Step Four: 10 Days Later Update
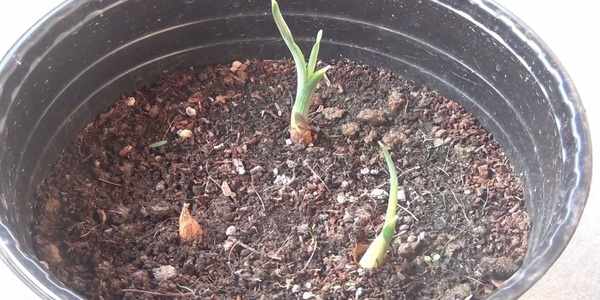
Since we are using Iris bulbs to grow Dutch Iris flowers, we will talk about the germination period of the bulbs. Usually, within 10 days of planting, the Iris bulb germinates. The initial sprouts look like stems of green onions. If your bulb has not germinated within the first 10 days, it is quite difficult that it will after this time. The bulb is either rotting from the inside or has not been planted correctly.
Sometimes, Dutch Iris bulbs start rotting due to over watering. Hence, in the initial stages, don’t water the plant a lot. One of the best practices while planting a Dutch Iris include watering a plant on the first day and then watering it again on the 10th day. Since, on the 10th day the plant has sprouted, it will need more water from now on. You can water it after every five days. However, if you have kept the plant indoor, the watering frequency should be even lower. don’t water the plant unless and until you find the top layer of the soil dried up. Moreover, while watering the plant use a shower tool, don’t pour water directly on the bulbs it will displace the soil.
Step Five: 47 Days Later Update
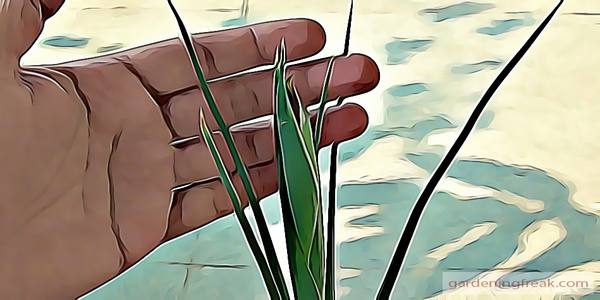
After around 47 to 50 days, that is almost 1.5 months, your plant should go into the first step of blooming. You should see a curled-up plant between two long green leaves. Since the flower is going to bloom; the plant needs more nutrition at this point. Before blooming, you don’t have to fertilize the soil. However, as soon as you start seeing the first signs of blooming, make sure you provide the plant with enough nutrition to develop a proper, vibrant, and healthy flower.
To fertilize the soil, you can add more vermin composting or homemade organic fertilizer. However, if you want fast absorption of nutrition, which is recommended at this point, using a liquid fertilizer is better for Iris plants, fertilizers high in phosphorus work best. When you incorporate these fertilizers into your gardening routine, consider the timing of your applications for optimal results. Additionally, planting garlic from cloves can serve as a natural pest deterrent while enhancing the soil quality at the same time. By mixing garlic into your planting scheme, you’ll create a healthier environment for your Iris plants and promote robust growth.
Iris Flower Types
Like many flowers, Iris’s also have many different species, and not all grow in the same way. Some are grown using tubers, while others are grown via bulbs.
There are two main types of Iris plants:
Iris Grown Using Bulbs

These are similar to the Dutch Iris that we talk about in this article. Usually, Dutch Iris and Reticulata Iris are grown using bulbs. If a plant blooms along with snowdrops, it is the latter, and if the plant blooms in midsummer, it will be the former.
Rhizome Grown Iris

Although it is more difficult, most iris grow from rhizomes. Identify Iris that grows from a rhizome is not exactly easy. You have to check the crest and the beard of the plant, which is why these plants are not recommended for amateur gardeners.
Other common types of Iris include:
- Bearded iris – Mostly known as German bearded iris.
- Beardless iris – In this list the most popular one are Siberian, Louisiana irises and Japanese irish, as well as Iris pseud Acorus.
- Crested iris – Iris cristata, Iris tectorum are most popular in this category
When to Plant Iris Bulbs
The Dutch Iris bulb is usually planted at the end of winter so that the flowers are ready for springtime. The temperature during these days should be above 20 degrees centigrade during the day and above 1- degrees centigrade during the night. If you plant it earlier than this, the flowers will die as soon as they bloom.
However, if you are planning to plant Iris bulbs indoors in containers, you can play around with the weather and provide the plant with required conditions.
Iris Bulbs Care Guide and Tips
Iris plants grown using bulbs is not a very difficult task, and they do not require a lot of care. However, somethings, you should take care of include:
Watering
Over-watering your plant, especially in the initial days, will kill it. Once you plant the bulbs, don’t water it again till the top layer dries out. In the initial days, the plant does not require a lot of watering.
Fertilizer
As soon as you see the first signs of blooming, add fertilizer to the soil. This is when the plant needs the most nutrition. In general, adding fertilizer every 30 days is a good practice.
Soil Composition
Soil composition plays a very important role, so make sure you don’t make any mistakes here.
Frequently Asked Questions
Some questions regarding planting Iris bulbs that most people ask are:
Here Can You Get Iris Bulbs From?
Iris bulbs can be easily found at any nursery or online gardening store. However, since they can go bad easily, it’s better to get them from a nursery after checking each peace.
Is Sunlight Important?
Yes, sunlight is very important for all plants. However, for Iris bulbs, it is critical. Thus, if you are planting it indoors, make sure you keep the pot in a sunlit area.
What Does Flower Aftercare Mean?
Iris flowers have a certain life after blooming. To make it long, protect it from harsh sunlight and make sure it gets enough water and fertilizer.
Conclusion
Iris flowers are one of the prettiest flowers and are considered easy to grow. This article was all about helping you understand each and every aspect of how to plant iris bulbs. They not only make perfect indoor and outdoor plants but are also amazing for bouquets and decorations. However, while planting makes sure you put in extra effort in the aftercare of the plant because that is what ensures its health and long life.
[…] love to eat plants bulbs. In some cases, we plant different kinds of flower bulbs like Irish bulbs inside a pot. Most of the time they dig the pot to find out those bulbs. So that they can eat […]