
Wondering how to grow arugula in the comfort of your own yard or windowsill? Look no further! In this article, we talked about growing arugula from seeds to the harvest, presenting not only how to do it in your garden, but also in a container and with a hydroponic system. As a wild-harvested origin, growing arugula is a fairly easy thing to do. They are also called rockets and they really reflect this name. Because for arugula vegetation is remarkably fast and often they become ready to eat months after the germination. However, before you take it lightly it’s actually fascinating to know how to properly plant arugula, start the seed and then transplant for the best possible yield.
So, ready to make your meals sharp with your own salad? Here is what you need now.
How To Grow Arugula
Method 1: How to Grow Arugula from Seed in a Garden
Step 1: Starting the seeds
First and foremost, buy the regular arugula seeds as they grow with lush leaves that are easy to cook and tastier. In addition, these arugulas don’t bolt quickly compared to the wild Italian species. To start seeds you need a garden container that has cells and drainage holes. You can get one from any home improvement store. Make sure to fill each cell with light potting soil leaving a bit of space at the top.
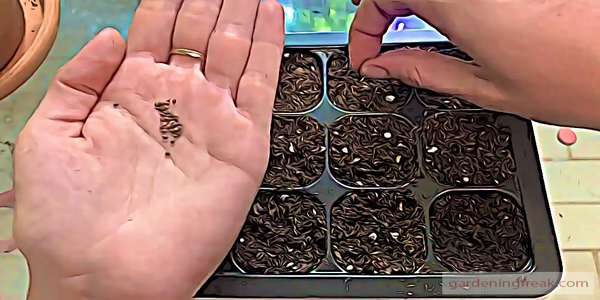
Now it’s time to plant the seeds. Place a couple of them in each cell and shade some soil on top. It is important to keep the soil moist and the seeds well watered.
Lastly, you should keep the container indoor and by the side of a window where sunlight has good access. Alternatively, you can use grow light if you can’t find a suitable place with the sun inside your house. With proper lights, you may see the seeds sprout within 4-6 days.
Step 2: Preparing the garden
Like any green herb/vegetable, arugula also needs fertilizer to flourish. You can enrich the garden soil with organic materials such as compost and dead leaves.
Adding these things also improves the overall drainage and prevents excessive moisture in the soil.
Step 3: Digging hole for the seedlings
When digging holes try to maintain 4-6 inch distance from each other and dig down to the depth of your cells. Finally, match the number of holes to the volume of your seedlings.
Step 4: Transplanting the seedlings
To make the transition effortless start by watering your seedlings in the cells. Now carefully flip the container upside down and slowly pull the seedlings and separate from the soil not doing any harm to them.
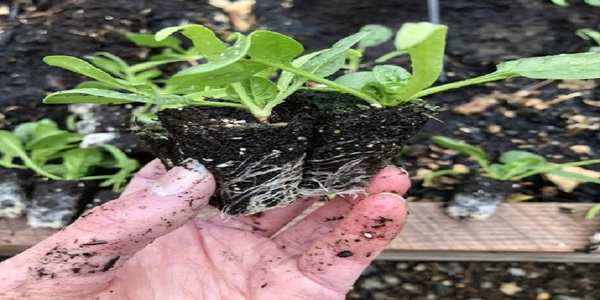
Afterward, put the seedlings in the garden holes and fill the gaps pushing some soil around each plant. This will provide the seedlings additional support when needed. Once the transplanting is complete, finish by watering them once again.
Step 5: Harvesting arugula
You can start picking up young leaves in about 30-40 days when they are full-grown and the seedling is 3 to 4 inches tall.
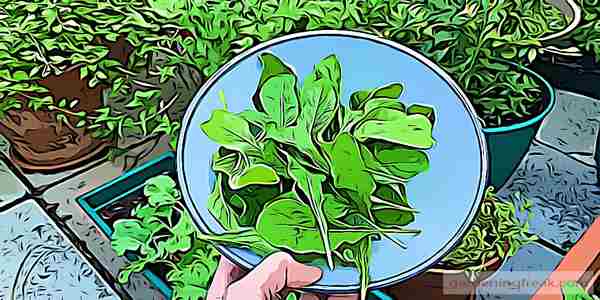
As opposed to pulling out the whole plant we would suggest cutting the leaves from the base and let them grow continuously. However, if you want to thin out the population pulling some of the plants would be necessary.
Method 2: Sowing arugula seeds directly into the soil
You can sow seeds directly into the soil during the spring especially when the threat of any frost is over. When sowing seeds make sure to scatter a bunch of them in each row being mindful about their germination rate. Later you can thin the seedlings to 4-6 inches apart and allow your plants the necessary room to grow. Last but not least, try to plant a new batch every 2 weeks for a consecutive harvest. Do this until a month ahead of the first frost date in your region. You can take full advantage of the arugula’s short maturity in this manner and enjoy its distinctive flavor throughout the season.
Method 3: How to Grow Arugula in a Container
You don’t need a big yard or years of expertise to grow your vegetables. You can create your growing system and in the convenience of a container. Growing arugula is no exception. Grow Arugula in a Container steps are as follow…
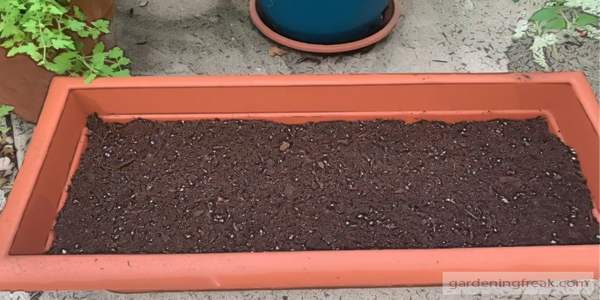
Step One: Choosing your container
Arugula roots are comparatively shallow and can grow on anything. Therefore it’s not necessary to find a deep or gigantic container. However, we would choose a wide one rather than regret later not finding enough to make our salad.

Besides, if you want, a self-watering container can make indoor gardening a lot easier for you.
Step two: Planting seeds
Although I’ve discussed this in the earlier section, here is the recap for you:
- Firstly, place your container in a suitable place with full sun
- Fill it with potting soil and gently level them up using your hand
- Spread a handful of seed evenly onto the potting mix
- With a slight push of your palm tap your seeds about ¼ inch below the soil
- Cover with light potting soil over the seeds and pat again
- End the process with some water carefully spraying over the medium from your hose
Step three : Growing arugula
You will have to wait one or two weeks for the seedlings to emerge. Check the pH of the soil and aim to keep it between 6 and 7. Additionally, keep the soil evenly humid this time around. Once the seedlings are about two inches tall, you can thin to 1 to 3 inches wide, rather than leaving them crowded.
Arugulas are likely be fully grown within a month and young leaves will be ready for harvesting.
Method 4 : How to Grow Arugula Hydroponically
Growing your plants without the soil is breathtaking. And that’s the beauty of hydroponic gardening that you can start in your home with water and nutrient solution and grow vegetables year-round.Growing arugula hydroponically step are as follow…
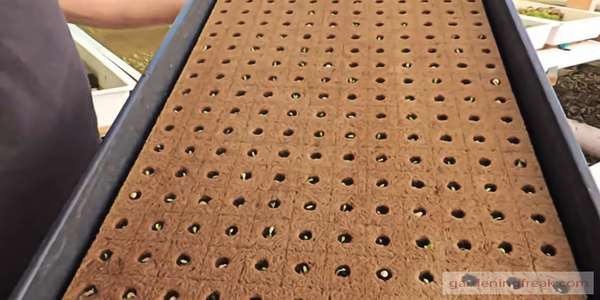
Step I : Preparing the horticubes and planting the seed
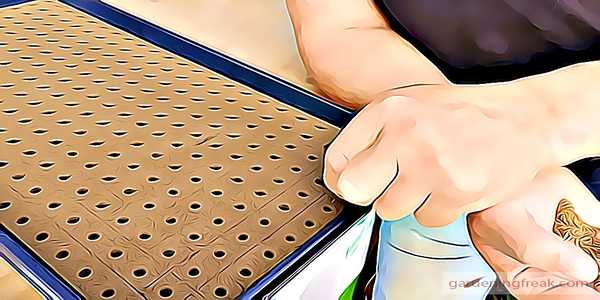
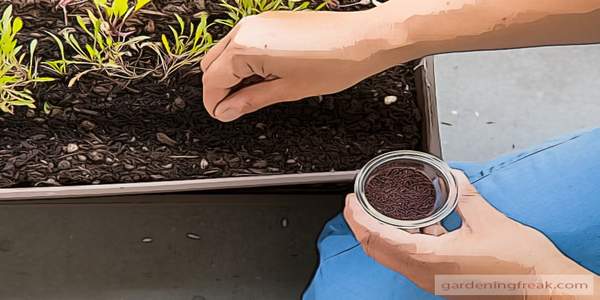
To begin with, weplant arugula seed in oasis horticubes and we use ten by twenty size trays also. At first we need to soak the whole tray with water. After that need to drop 8 to 12 seeds per hole.
Step ii : Adding root conditioner

To accelerate the growth of the new germination arugula we use the root conditioner into our oasis horticubes tray . For this we first took one jug of water around one liter and mix one cup of root conditioner into it and pour the whole mixture into our tray
Step iii: Put the germination tray under the light
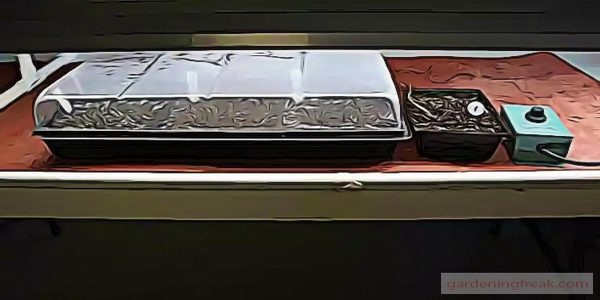
After that we put our germination tray under the light for the next three to four days. In that time we need not to water our tray again
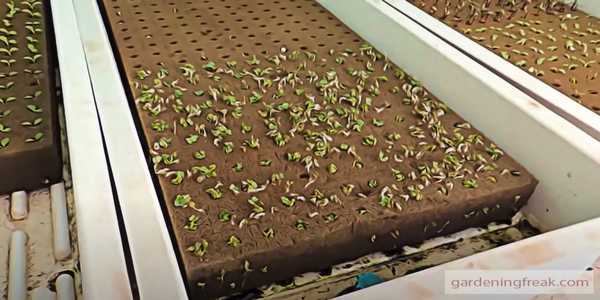
Step iv : Start to grow new Arugula seedlings
On the fithth to sixth day we can see some new seedlings like the above picture. We put them in is situation for two and three days more.
Step v : Transfer the whole oasis horticubes on a bigger tray
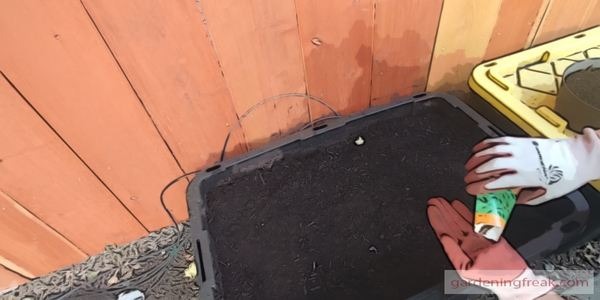
After one week we transfer the whole oasis horticubes on a bigger tray and also put some water on it .
Step vi : After 14 days update
The whole arugula seedling become much bigger in this stage . This is the stage when we need to separate the big horti cubes into some small peace .
Step vii : Put the cubes into small pieces and transfer them to the farm stand
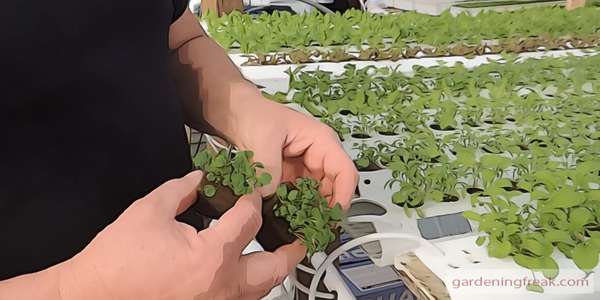
Now its time to cut the cubes in some small pieces and make sure there is at list four to six plant in each small block. After that transfer each of those blocks in the hydroponic horizontal farm stand.
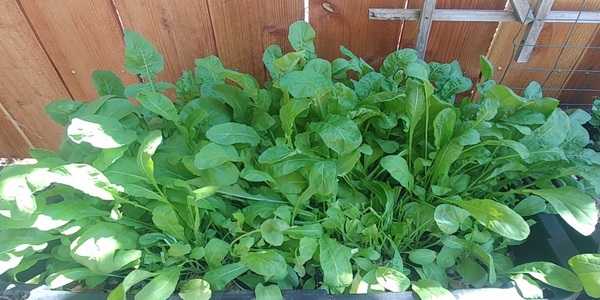
Step Viii: Mature stage and harvesting time
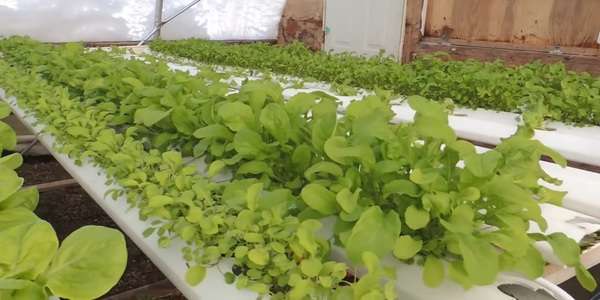
Hopefully, in three weeks you can start harvesting the arugula when they’ll grow 3 to 4 inch wide. You can cut the outermost leaves or harvest the whole plant at the bottom in one go. In terms of location, you have to keep your hydroponic system in partial sun during summer and in full sun during winter. If any leaves seem lifeless/dying out, you should remove them as early as you can to avoid any sort of diseases.
Arugula Growing Temperature: When to grow them
Arugula germinates quickly in mild and cold weather, particularly when the temperature ranges from 45 to 65 degree Fahrenheit.
Arugula can even withstand light frost, but seeds should be started as soon as it is feasible in the early spring and late fall. Doing this will make sure the growing temperature is ideal when you will transplant the seedlings into the garden.
Here is a handy checklist.
- Arugula germination temperature: 40 F to 55 F
- Days to germinate: 5 to 7 days
- Arugula growing temperature: 50 F to 65 F
Growing Arugula Problems
Pests
Due to inherent hardiness and short growth to maturity cycle arugula plants are less likely to find pests or exposed to diseases. However, in terms of pests, it is flea beetles, more often than not the only trouble maker when growing arugula. They can leave a severe dent and damage the leaves.
That said, by floating row covers, you can easily deal with the situation. It is a non-toxic solution to the problem as well. Besides, to significantly reduce the population of harmful pests, you can grow plants such as yarrow/marigold and attract beneficial insects into the garden. Additionally, incorporating natural predators can create a balanced ecosystem in your garden, further minimizing pest issues. To enhance this approach, you might consider learning how to care for praying mantis, as they are effective hunters that can significantly contribute to reducing pest populations. By nurturing these beneficial insects alongside your protective measures, you’ll foster a healthier garden environment.
Temperature
A common arugula growing problem arises when people delay sowing seeds and can’t work out a suitable time for cultivation. Remember, arugula is a cool-season crop and won’t thrive when the weather is too warm. Instead, they will bolt and reach the reseed pretty early. To avoid this, you should sow arugula either in the early days of spring or in the late summer.
When your plants begin to flower, harvest the entire crop and reseed later. Alternatively, you can slow down the bolting by providing some shades to the plants. To reduce the heat stress you should water the bed evenly and regularly in the summer.
On the flip side, serious frost can also damage or stress your arugula. Therefore, whenever it is predicted make sure you are using the row covers to reduce the negative impacts on your plants.
Growing Arugula FAQs
Does arugula reseed itself?
Like most leafy greens, arugula begins setting seeds, particularly when the summer arrives and the temperature gets warmer. As the plants mature, they will sprout a few flowers, and if you leave them like this, they will spread the seeds and continue to reseed themselves.
How do I keep the flavor of arugula from growing strong?
You need younger leaves to produce more in your garden. You should maximize harvesting and encourage new leaves more frequently to replace the older ones. It is also possible to grow arugula twice a month and receive a consistent supply of fresh and tasty crops.
Does arugula need a lot of water?
In order to keep the soil moist and for the best harvest, watering arugula is important. It is equally important, though, that you’re only doing enough and not causing the soil to be waterlogged. Water every alternative day, predominantly when the surface soil becomes drier.
How many arugula seeds per hole?
The answer largely depends on the germination rate of the plant. The information is typically written on the package and according to this, you have to decide how many seeds you can plant in each hole.
Seeds never have a 100% germination rate meaning you should leave more than one seeds per hole. Generally, it is advised to plant at least 2-3 seeds in each hole for a reasonable population.
What are the best arugula companion plants?
Onion & Garlic: The pungent odor of onion and garlic deters cabbage whites from laying eggs on your arugula.
Cucumber: Cucumber is a great companion plant for arugula as they grow vertically, leaving enough room for leafy vegetables to grow. In addition, their leaves will provide a lot of shade to the arugula during hot spells and thus can delay the bolting.
Celery: Much like arugula, celery grows well in moist soil and thereby could be an excellent companion plant.
Beetroot/lettuce/spinach: These leafy greens grow hand in hand and give natural shades in hot sunny days to arugula, maximizing the productivity of the plants.
Wrapping Up
Growing arugula is less expensive than buying and also rewarding as they can be taken fresh right after picking up from the garden. And, now you know nearly everything about how to grow arugula. We hope you can go a step further and give it a try.
If you are short on space, use a container and the information shared above for successfully growing your plants and enjoy unusual varieties. Believe me, you’ll be glad that you did and regret it if you give up on a chance as easy as this.


[…] is also very helpful to grow different types of herbs and vegetable, specially its helps to grow arugula vegetable in garden and […]